A well-installed tiled surface can make a room look clean, balanced, and professionally finished. However, even high-quality tiles can look unattractive when the grout lines are uneven or the tiles gradually lose alignment. Uneven tile lines are often caused by inaccurate measurements, inconsistent spacing, an improperly prepared surface, or tiles shifting before the adhesive sets.
For reliable installation results, proper planning and attention to alignment are essential. Professional tiling services can also help ensure that tiles are positioned accurately and finished with consistent spacing.
1. Prepare the Surface Properly
Before installing tiles, inspect the surface carefully. The substrate should be sufficiently flat, clean, dry, and stable. High spots, dips, dust, or loose material can affect how tiles sit and make it difficult to maintain straight lines.
For larger-format tiles, surface flatness becomes even more important because small variations can become more noticeable across larger tile surfaces.
2. Plan the Tile Layout Before Installation
Avoid starting installation without planning the layout. Measure the area and determine where the first row should begin. A poor starting point can cause the final rows to become narrow or uneven.
Use a chalk line, laser level, or suitable measuring tool to establish straight reference lines. These guidelines help installers maintain consistency across the entire surface.
3. Use Tile Spacers
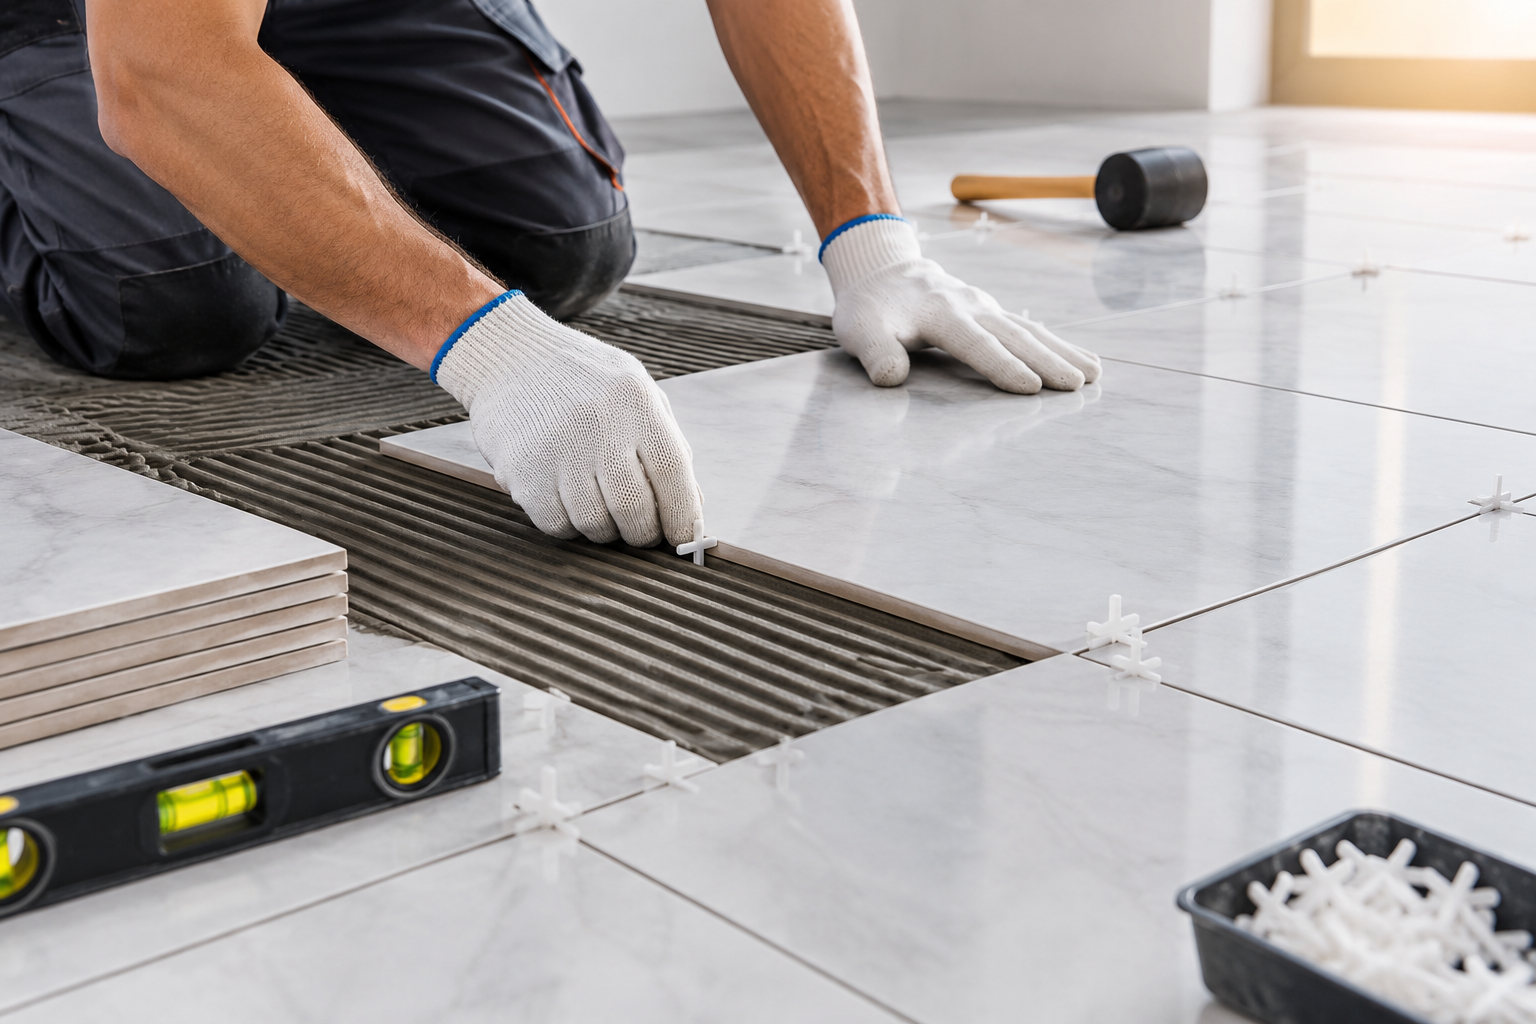
Tile spacers are one of the simplest ways to maintain consistent grout joints. They hold tiles at a fixed distance from each other and help prevent spacing variations as installation progresses.
Choose spacer sizes according to the tile type, manufacturer's recommendations, and desired grout joint. Avoid relying only on visual estimation because even small spacing differences can become obvious once the grout is applied.
4. Check Tile Alignment Frequently
Do not wait until the entire area is tiled before checking alignment. Regularly inspect rows and columns during installation.
A straightedge or level can help identify tiles that have shifted or moved out of position. Correcting a tile while the adhesive is still workable is much easier than fixing an alignment problem after it has cured.
5. Apply Adhesive Consistently
Uneven adhesive application can cause some tiles to sit higher or lower than others. This creates lippage and can also affect the appearance of grout lines.
Spread the adhesive evenly using the appropriate notched trowel and follow the adhesive manufacturer's instructions. Large-format tiles may require additional attention to adhesive coverage and back-buttering.
6. Consider a Tile Levelling System
For large-format tiles, a tile levelling system can help keep adjacent tile surfaces at a similar height while the adhesive cures. These systems typically use clips and wedges or caps to reduce differences between neighbouring tiles.
It is important to remember that a levelling system cannot correct an improperly prepared substrate. The surface should still be adequately flat before installation.
7. Avoid Installing Tiles Too Quickly
Rushing through installation can lead to inconsistent spacing and alignment. Give yourself enough time to check each tile before moving to the next section.
Remove excess adhesive from joints as required and make small adjustments while the adhesive remains workable. Careful installation is particularly important around corners, doorways, edges, and transitions.
8. Be Careful With Offset Tile Patterns
Offset or brick-style layouts require additional attention because long tiles can have slight variations or natural bowing. Excessive offsetting can make height differences between neighbouring tiles more noticeable.
Follow the tile manufacturer's recommended installation pattern and use appropriate spacers or levelling tools to maintain consistent joints.
9. Check the Grout Lines Before Grouting
Before applying grout, inspect the complete tiled area. Look for:
- Uneven gaps
- Misaligned rows
- Tiles sitting at different heights
- Shifted corner joints
- Excess adhesive inside grout joints
- Inconsistent tile positioning
Correcting these issues before grouting can save significant time and prevent an uneven final appearance.
10. Choose Professional Tiling Services
Achieving perfectly aligned tile lines requires more than simply placing tiles next to each other. Proper surface preparation, accurate measurements, consistent adhesive application, correct spacing, and careful finishing all contribute to installation quality.
If you need professional assistance, https://www.singcons.com/tiling.php provides tiling services focused on achieving a neat and durable finish.
FAQ
What causes uneven tile lines?
Common causes include inaccurate layout planning, inconsistent tile spacing, an uneven substrate, incorrect adhesive application, and tiles shifting during installation.
Are tile spacers necessary?
Tile spacers help maintain consistent grout-joint widths and make it easier to keep rows and columns aligned.
Can a tile levelling system prevent uneven tiles?
A levelling system can help keep adjacent tiles at similar heights during curing, particularly with large-format tiles, but it does not replace proper substrate preparation.
How can I get straight grout lines?
Use accurate reference lines, suitable tile spacers, consistent adhesive application, and regularly check alignment throughout the installation process.
Conclusion
Uneven tile lines can reduce the visual quality of an otherwise well-designed space. Proper surface preparation, careful layout planning, consistent spacing, accurate alignment, and suitable installation tools can significantly improve the final result. For dependable results and a professional finish, consider expert tiling services at https://www.singcons.com/tiling.php.
Need Transformation
Transforming a tiled space requires more than simply replacing old tiles. Uneven lines, inconsistent spacing, damaged surfaces, and outdated patterns can affect the overall appearance of a property. A professional tiling transformation can improve visual consistency, functionality, durability, and maintenance while giving the space a cleaner and more modern finish.
Whether you are upgrading a bathroom, kitchen, office, commercial area, or other interior space, proper planning and skilled installation can make a significant difference. Explore professional tiling solutions at https://www.singcons.com/tiling.php to achieve a more polished and durable tiled surface.